
📘 Terraform Series – Day 7
Gujjar Apurv is a passionate DevOps Engineer in the making, dedicated to automating infrastructure, streamlining software delivery, and building scalable cloud-native systems. With hands-on experience in tools like AWS, Docker, Kubernetes, Jenkins, Git, and Linux, he thrives at the intersection of development and operations. Driven by curiosity and continuous learning, Apurv shares insights, tutorials, and real-world solutions from his journey—making complex tech simple and accessible. Whether it's writing YAML, scripting in Python, or deploying on the cloud, he believes in doing it the right way. "Infrastructure is code, but reliability is art."
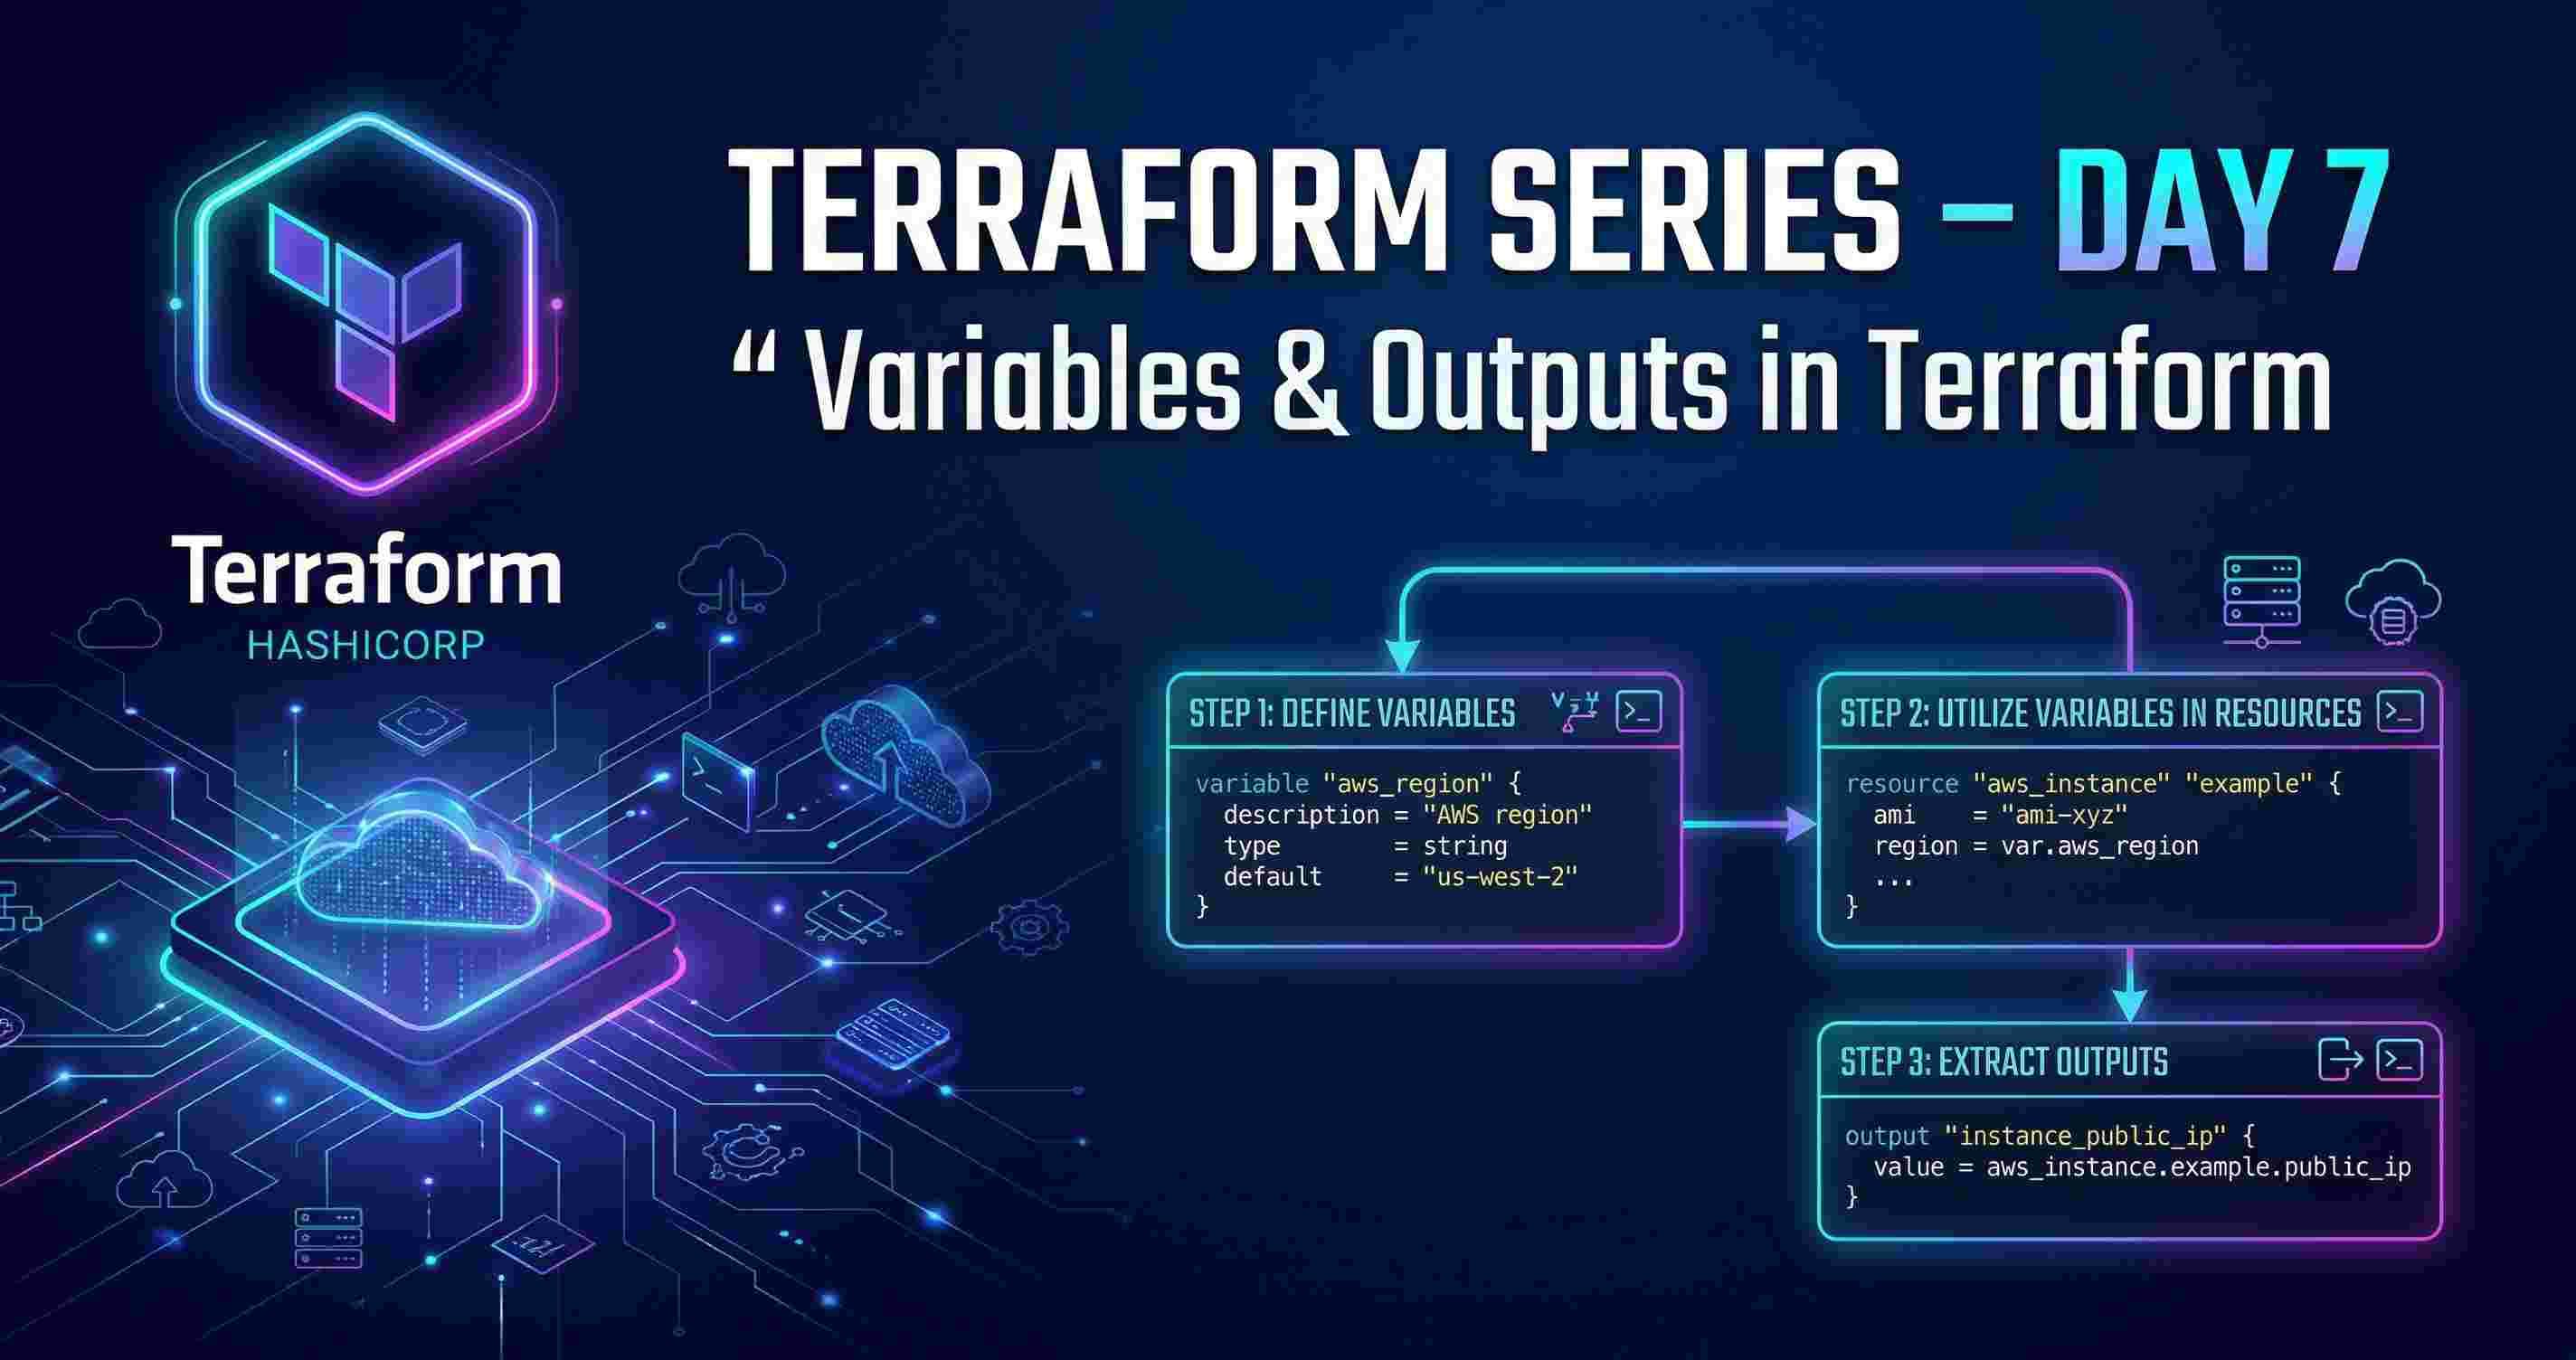
Variables & Outputs (Make Your Code Smart 🔥)
In real-world DevOps, writing flexible and reusable code is very important.
Today, we will learn how to use Variables and Outputs in Terraform to make our infrastructure clean, dynamic, and production-ready.
Till now, we were writing Terraform code…
but there was one problem 👇
👉 Everything was hardcoded
And in real DevOps, hardcoding = BIG mistake ❌
So today we fix that 💡
🧩 Step 1: The Real Problem
Imagine this:
instance_type = "t2.micro"
Looks simple… but 👇
❌ Want to upgrade instance? Change everywhere
❌ Want reuse? Not possible
❌ Working in team? Becomes messy
👉 Basically: Not scalable
💡 Step 2: The Smart Solution → Variables
Instead of fixing values in code, we use variables
Think like this:
👉 “Keep values separate, keep code clean”
✔ Why Variables?
Change once → Apply everywhere
Clean & readable code
Reusable infrastructure
Industry-level practice
📌 In short:
Variables = Flexibility + Clean Code + DevOps Standard
📄 Step 3: Create variables.tf
variable "ec2_instance_type" {
  default = "t2.micro"
  type    = string
}

variable "ec2_root_storage_size" {
  default = 10
  type    = number
}

variable "ec2_ami_id" {
  default = "ami-0cb91c7de36eed2cb"
  type    = string
}

🧠 Simple Understanding:
variable→ variable namedefault→ default valuetype→ data type
👉 Values are now separated from the main code ✅
🔗 Step 4: Use Variables in ec2.tf
Now the real magic 🔥
# Create Key Pair
resource "aws_key_pair" "my_key" {
  key_name   = "terra-key-aws"
  public_key = file("terra-key-aws.pub")
}


# Default VPC
resource "aws_default_vpc" "default" {}

# Security Group
resource "aws_security_group" "my_groups" {
  name        = "my-group"
  description = "Security group for EC2"
  vpc_id      = aws_default_vpc.default.id

  ingress {
    from_port   = 22
    to_port     = 22
    protocol    = "tcp"
    cidr_blocks = ["0.0.0.0/0"]
    description = "Allow SSH"
  }

  ingress {
    from_port   = 80
    to_port     = 80
    protocol    = "tcp"
    cidr_blocks = ["0.0.0.0/0"]
    description = "Allow HTTP"
  }

  egress {
    from_port   = 0
    to_port     = 0
    protocol    = "-1"
    cidr_blocks = ["0.0.0.0/0"]
    description = "Allow all outbound"
  }

  tags = {
    Name = "automate-sg"
  }
}

# EC2 Instance
resource "aws_instance" "my_instance" {
  ami                    = var.ec2_ami_id
  instance_type          = var.ec2_instance_type
  key_name               = aws_key_pair.my_key.key_name
  vpc_security_group_ids = [aws_security_group.my_groups.id]

  root_block_device {
    volume_size = var.ec2_root_storage_size
    volume_type = "gp3"
  }

  tags = {
    Name = "terra-ec2"
  }
}
⚡ Important Line:
var.<variable_name>
👉 Example:
var.ec2_instance_type
🔄 Step 5: Real Power of Variables
Before:
instance_type = "t2.micro"
After:
default = "t3.micro"
✔ Change in one place
✔ Applied everywhere automatically
🔥 That’s the power
📤 Step 6: Now Let’s Talk About Outputs
Deployment is done… but now 👇
👉 How do you get EC2 Public IP?
😓 Problem
❌ You have to manually check AWS Console
💡 Solution → Outputs
Terraform will show it directly 🔥
📄 Step 7: Create outputs.tf
output "ec2_public_ip" {
  value = aws_instance.my_instance.public_ip
}

output "ec2_public_dns" {
  value = aws_instance.my_instance.public_dns
}

🧠 What Happens Now?
When you run:
terraform apply
👉 At the end, Terraform shows:
✔ Public IP
✔ Public DNS
Directly in terminal 🎯

👨💻 About the Author

“A complete Terraform series covering everything from fundamentals to advanced real-world infrastructure automation in a DevOps environment.”
📬 Let's Stay Connected
📧 Email: gujjarapurv181@gmail.com
🐙 GitHub: github.com/ApurvGujjar07
💼 LinkedIn: linkedin.com/in/apurv-gujjar